The Flicker overlays (superimposes) two selected total body images and "flickers" between them to help you identify changes to a patient's lesions over time. In order to ensure an accurate matching process, it's important that all detected lesions within an image are correctly paired. To improve the accuracy of Flicker, you have the ability to manually review and remove wrong pairs following the instructions below:
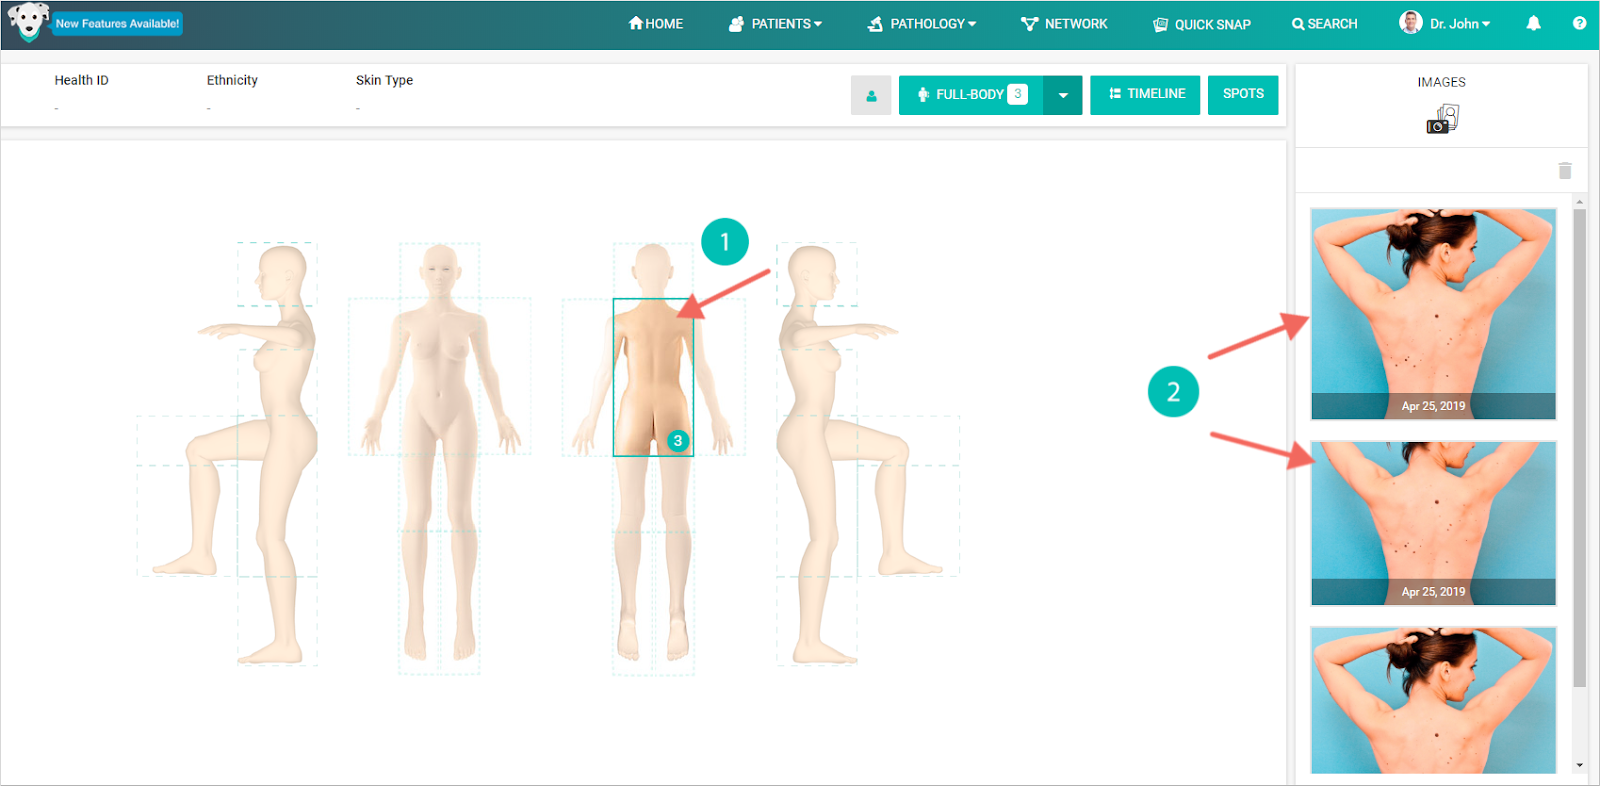
- Access your patient’s total body photography profile, then click the desired body part, then select the images you would like to compare. (To learn how to run Lesion Mapping click here).
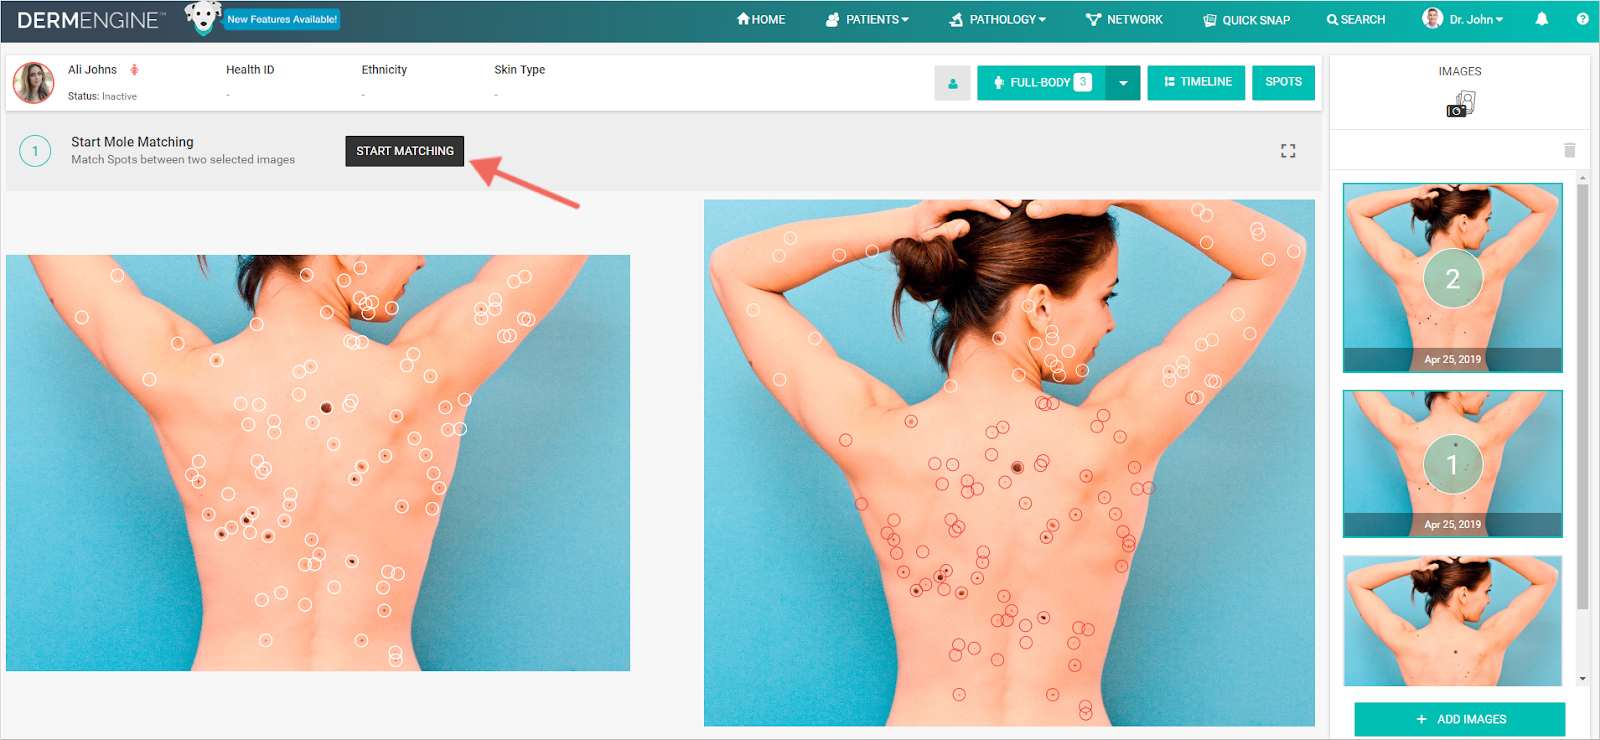
- Click Start Matching. Please wait a moment, as it may take time to process this request depending on the number of spots on the patient.
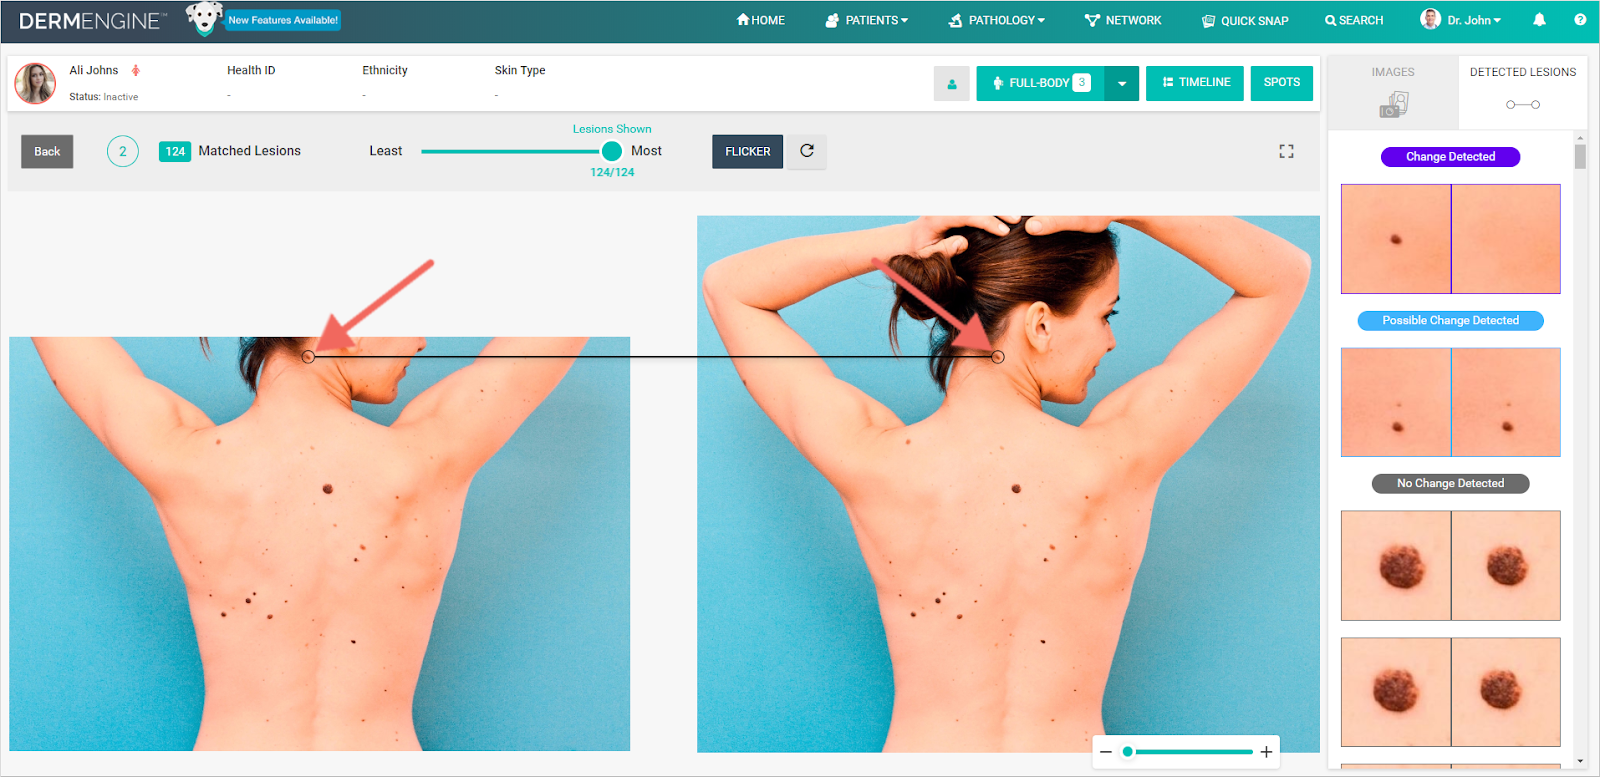
- Review the Detected Lesion pairs in the column on the right side of the page. As you go through, you can make the following modifications:
New Pair
- Click on a new lesion you would like to match, then click on its counterpart in the second image.
- Confirm that you would like this pair to be matched.
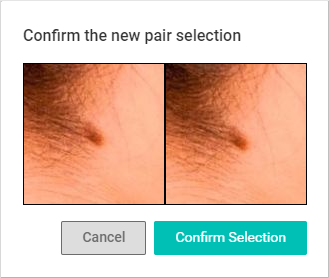
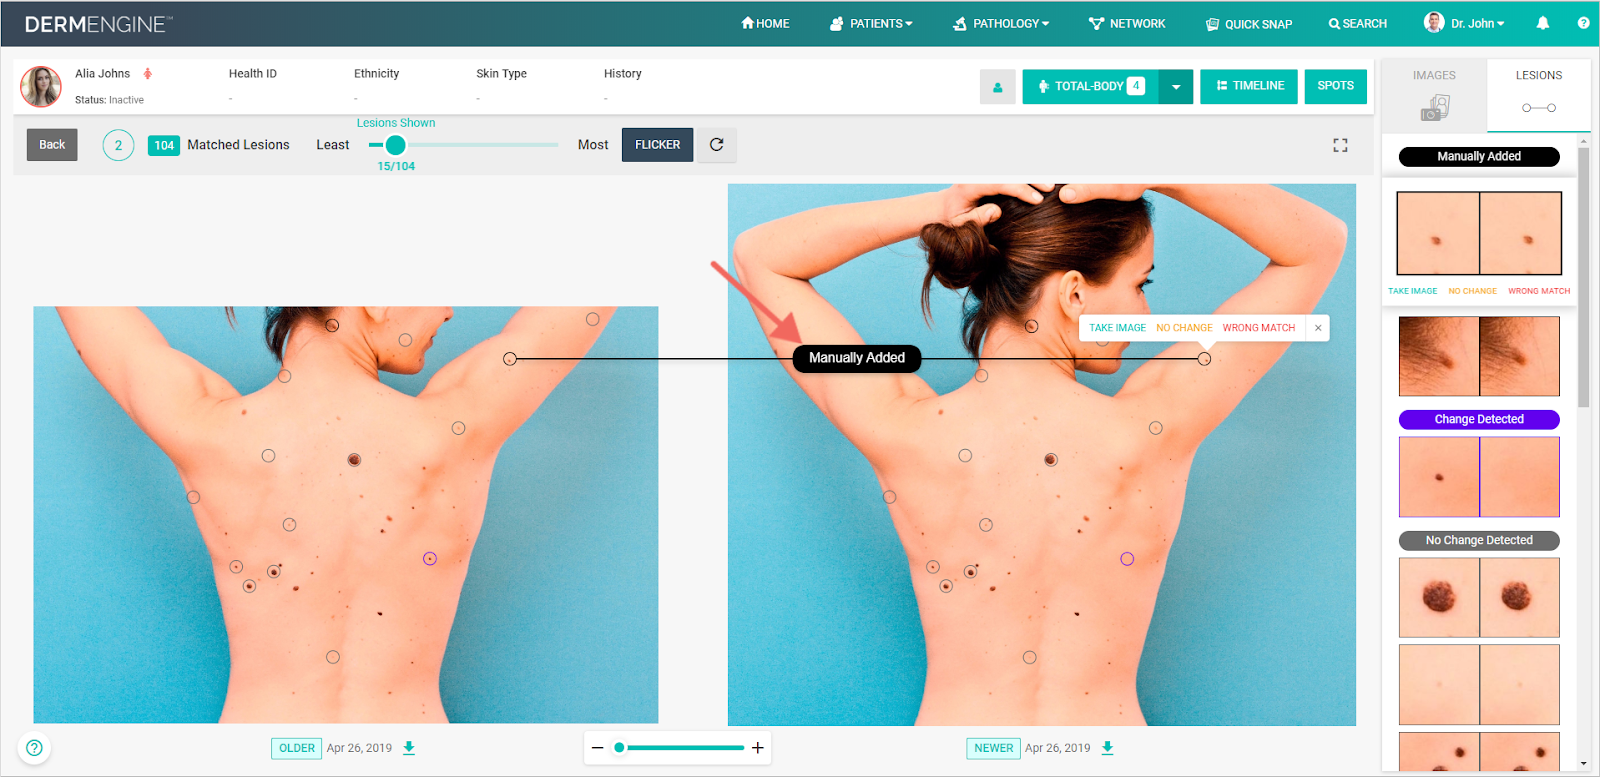
- Your new pair will appear as labelled 'Manually Created'. Based on your new match, DermEngine’s algorithms will automatically work to match any new corresponding spots it identifies between the two images.
Pair Changed
- Select the spot which you would like to mark as changed. Click the
 and then click 'Changed'.
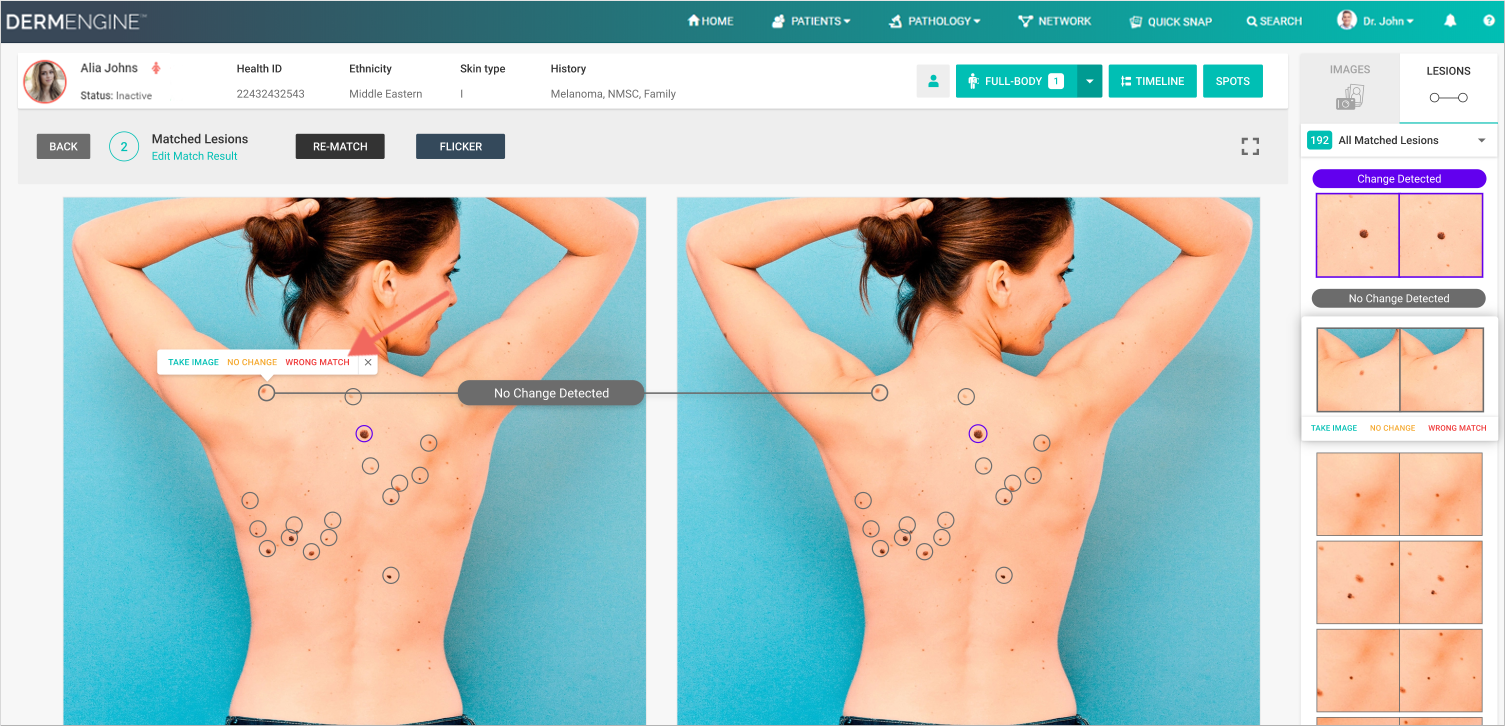
- The newly labelled spot will be moved to the top of the image carousel on the right.

Delete A Pair
- To delete a pair, simply click that lesion and select 'wrong match'.
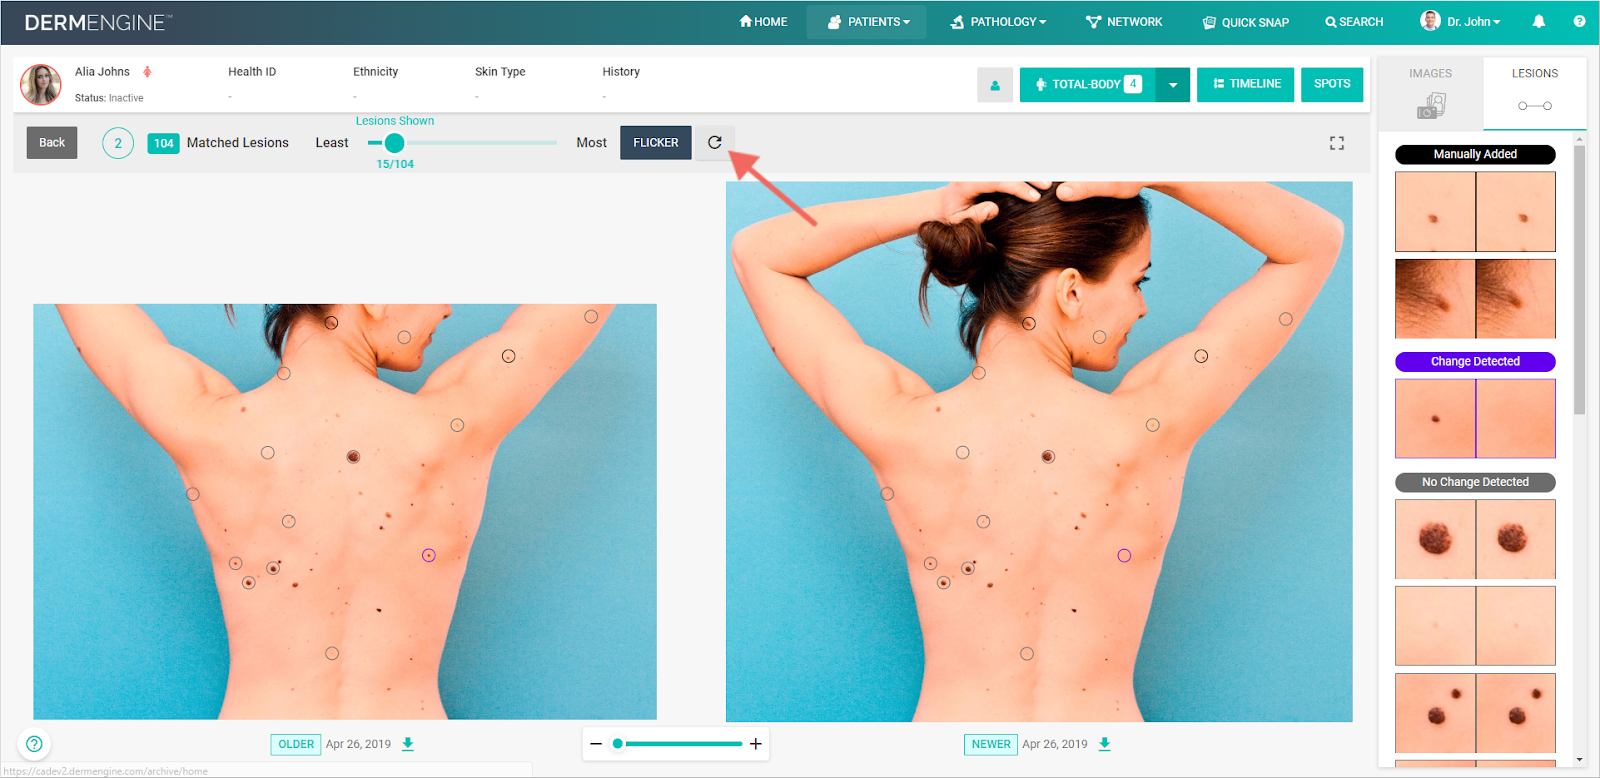
Update Flicker
- Once you have documented at least one new lesion you have the ability to re-run Flicker’s algorithms to take into account the new lesion(s) by clicking the
 icon. (Note that if you had more than 10 lesions Flicker will automatically refresh)